
Express.js에서 OpenAPI를 사용해 Swagger 문서를 설정할 때는, 설정 파일과 스키마를 하나하나 직접 정의해가며 꽤 많은 작업을 해야 했다. 반면 Nest.js에서는 @nestjs/swagger 라이브러리를 사용하면, 비교적 적은 설정만으로도 Swagger UI를 빠르게 구성할 수 있다.
Nest.js의 가장 큰 강점은 컨트롤러와 데코레이터에 이미 존재하는 메타데이터를 Swagger 문서로 그대로 끌어올 수 있다는 점이다. 덕분에 API 문서를 따로 관리하기보다, 코드 자체를 문서의 단일 진실 공급원(source of truth)으로 삼을 수 있다.
Swagger 설정
Swagger UI를 띄우는 설정은 main.ts에서 이루어진다. DocumentBuilder를 사용해 기본적인 문서 정보를 설정하고, SwaggerModule을 통해 문서를 생성한 뒤 UI를 연결한다.
import { SwaggerModule, DocumentBuilder } from '@nestjs/swagger';

// main.ts
async function bootstrap() {
  const app = await NestFactory.create(AppModule);

  const config = new DocumentBuilder()
    .setTitle('API 문서 제목')
    .setDescription('API 설명')
    .setVersion('API 버전')
    .build();

  const document = SwaggerModule.createDocument(app, config);
  SwaggerModule.setup('swagger', app, document);

  await app.listen(3000);
}
bootstrap();
이 정도 설정만 해두어도 @nestjs/swagger는 컨트롤러에 정의된 엔드포인트들을 자동으로 수집해 Swagger UI를 구성해준다. 이후 개발자가 신경 써야 할 부분은 요청과 응답을 어떻게 표현할지뿐이다.
엔드포인트 설정
@nestjs/swagger는 데코레이터 기반 설정을 적극적으로 활용한다. 각 엔드포인트에는 @ApiOperation 데코레이터를 사용해 요약, 설명, 태그 등을 지정할 수 있다.
@Get()
@ApiOperation({
  summary: 'Get all users',
  description: 'This endpoint returns a list of all users in the system',
  tags: ['users'],
})
getAllUsers() {}
또한 엔드포인트가 더 이상 사용되지 않는 경우 deprecated 옵션을 통해 이를 명시할 수도 있다.
컨트롤러 단위로 태그를 묶고 싶다면 @ApiTags를 사용한다. 이때 @ApiOperation의 tags와 함께 사용하면, @ApiTags의 값이 우선 적용된다.
@ApiTags('Report')
@Controller('report')
export class ReportController {}
인증 / 인가 설정
Swagger에서는 OpenAPI의 securitySchemes에 대응하는 여러 데코레이터를 제공한다. 기본적으로는 @ApiSecurity를 사용하며, 상황에 따라 @ApiBearerAuth, @ApiOAuth2, @ApiCookieAuth 같은 축약 데코레이터도 사용할 수 있다.
다만 브라우저 보안 정책 때문에 Swagger UI에서 쿠키가 요청 헤더에 포함되지 않는 경우가 있다. 쿠키 기반 인증을 사용하는 경우라면, Swagger UI에서 인증 테스트가 정상적으로 동작하지 않을 수 있다는 점을 염두에 두어야 한다. 이 부분은 Swagger 공식 문서에서도 언급하고 있다.
요청 설정
클라이언트 요청은 쿼리 스트링, 패스 파라미터, 요청 바디를 통해 서버로 전달된다. 이를 Swagger 문서에 명시하기 위해 각각 @ApiQuery, @ApiParam, @ApiBody 데코레이터를 사용한다.
@Get(':id')
@ApiParam({
  name: 'id',
  description: 'The ID of the user',
  type: String,
})
getUserById(@Param('id') id: string) {
  return `User with ID ${id}`;
}@Get()
@ApiQuery({ name: 'age', required: false, type: Number })
@ApiQuery({ name: 'gender', required: false, type: String })
getUsers(
@Query('age') age: number,
@Query('gender') gender: string,
) {}@ApiBody({
schema: {
type: 'array',
items: {
type: 'array',
items: { type: 'number' },
},
},
})
async create(@Body() coords: number[][]) {}DTO를 사용하지 않는 경우에도 @nestjs/swagger는 @Body, @Param, @Query를 인식해 기본적인 스키마를 자동 생성한다. 다만 세부적인 옵션은 기본값으로 채워진다.
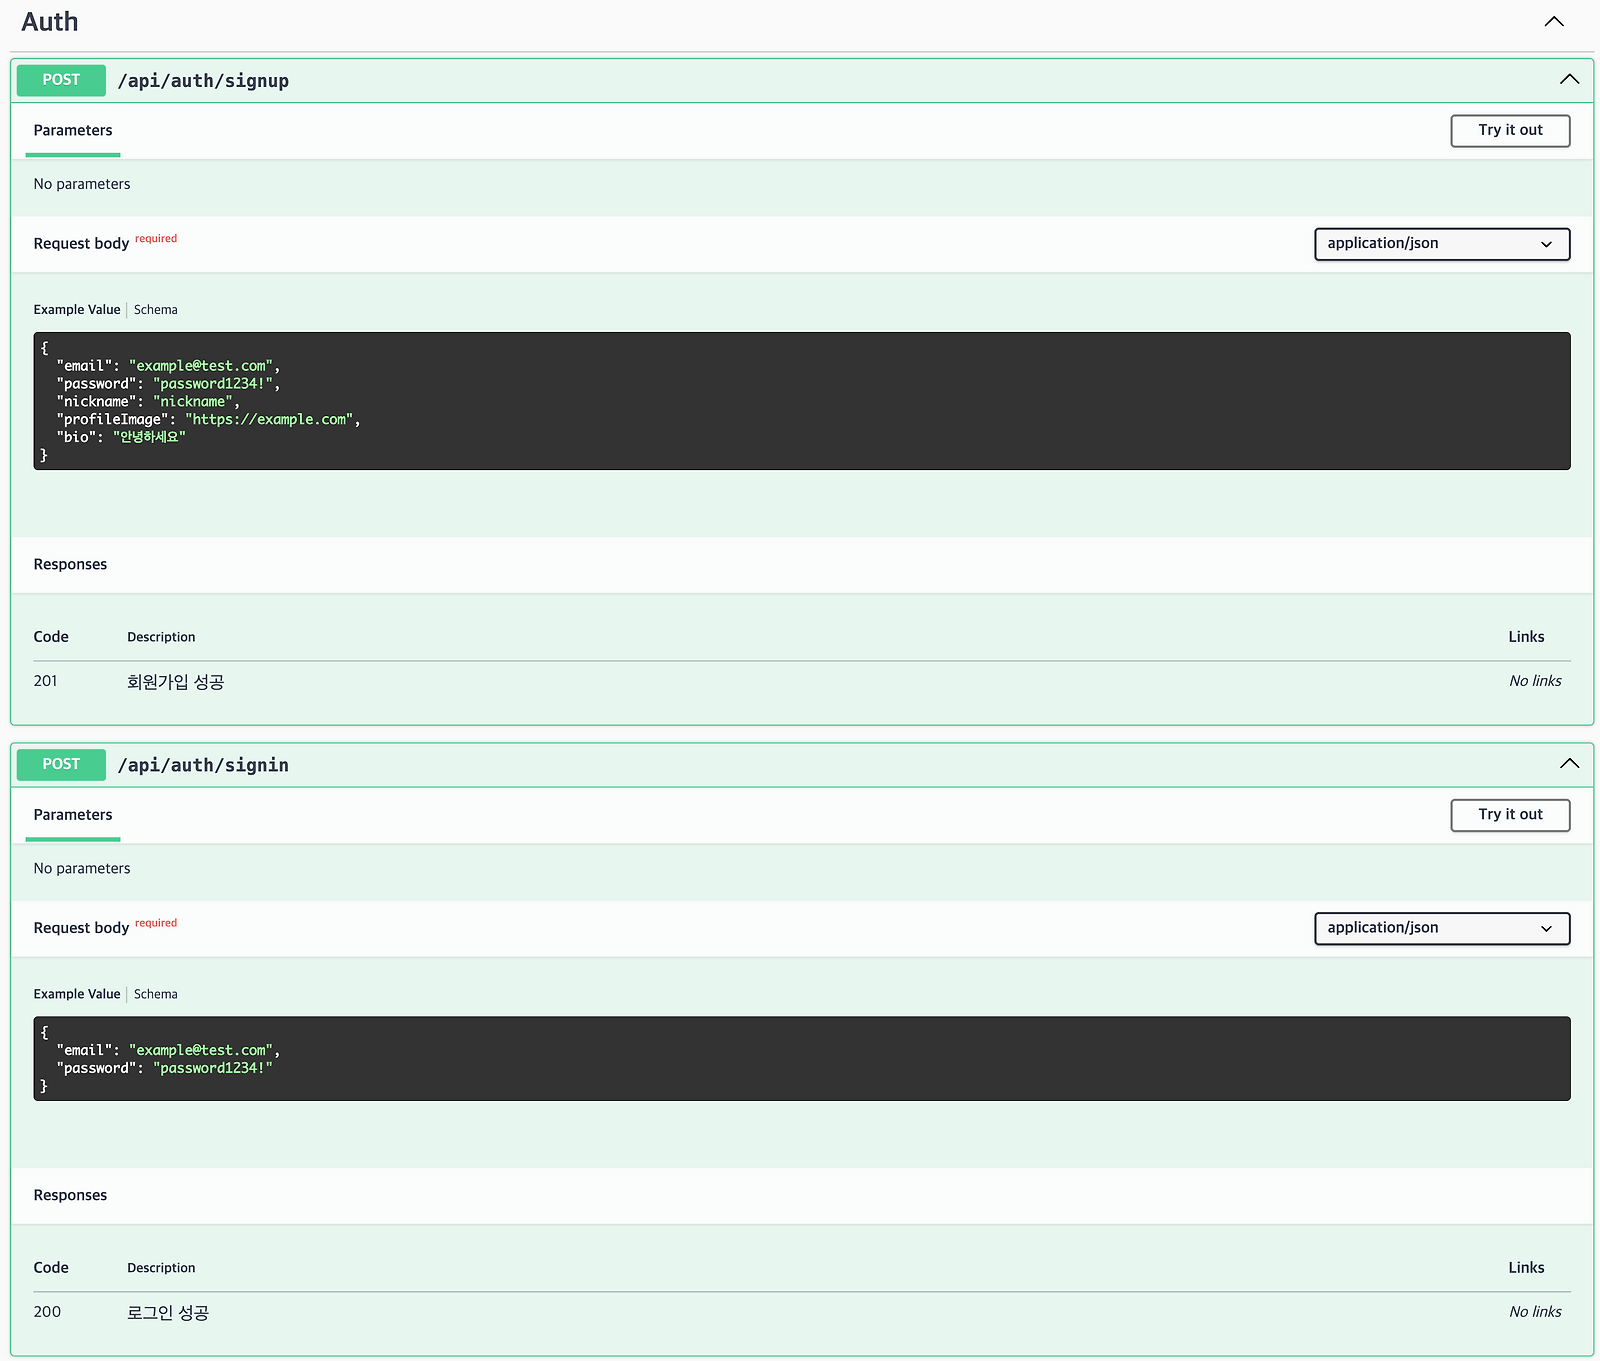
DTO를 사용하는 경우에는 @ApiProperty, @ApiPropertyOptional을 통해 훨씬 정교한 문서를 만들 수 있다.
export class SignUpDto {
  @ApiProperty({ example: 'example@test.com' })
  email: string;

  @ApiProperty({ example: 'password1234!' })
  password: string;

  @ApiPropertyOptional({ example: 'https://example.com' })
  profileImage?: string;

  @ApiPropertyOptional({ example: '안녕하세요' })
  bio?: string;
}
enum 값이 제한된 경우에도 enum 옵션을 통해 명시할 수 있다.
mapped-types와 Swagger
@nestjs/mapped-types를 사용해 DTO를 파생시키면, @ApiProperty 메타데이터가 사라지는 문제가 있다. 이는 Swagger 문서 생성 시 필요한 메타데이터가 복사되지 않기 때문이다.
이를 해결하기 위해 @nestjs/swagger는 자체적인 mapped-types 유틸리티를 제공한다.
import { PickType } from '@nestjs/swagger';

export class SignInDto extends PickType(SignUpDto, [
  'email',
  'password',
] as const) {}
이 방식을 사용하면 원본 DTO에 정의된 @ApiProperty 정보가 파생 DTO에도 그대로 유지된다.
이미지 업로드
멀티파트 요청 역시 Swagger 문서에 명시할 수 있다.
class FilesUploadDto {
  @ApiProperty({
    name: 'images',
    type: 'array',
    format: 'binary',
  })
  files: Express.Multer.File[];
}@Post('/multi-upload')
@UseInterceptors(FilesInterceptor('images'))
@ApiConsumes('multipart/form-data')
@ApiBody({
type: FilesUploadDto,
})
async putImages(@UploadedFiles() files: Express.Multer.File[]) {}응답 설정
응답은 @ApiResponse 계열 데코레이터를 사용해 정의할 수 있다. 상태 코드별로 이미 분리된 데코레이터들이 제공되며, 이는 Nest.js의 예외 클래스 구조와도 잘 맞는다.
@ApiOkResponse({
  description: '로그인 성공',
  type: ResponseMessageDto,
})
@Post('signin')
async signIn() {}
간단한 응답이라면 DTO 대신 schema를 직접 정의할 수도 있다.
@ApiOkResponse({
  description: '로그인 성공',
  schema: {
    type: 'object',
    properties: {
      message: { type: 'string' },
    },
  },
  example: { message: '로그인 성공' },
})
@Post('signin')
async signIn(@Body() signInDto: SignInDto, @Res() res: Response) {}
Discriminated Union 처리
프론트엔드에서 openapi-typescript 같은 도구를 사용해 타입을 생성하는 경우, 백엔드에서 Discriminated Union 형태로 응답을 설계해주면 타입 안정성이 크게 향상된다.
Nest.js와 Swagger에서는 @ApiExtraModels와 oneOf 옵션을 활용해 이를 명확히 표현할 수 있다. 이렇게 작성하면 Swagger UI에서도 응답 케이스가 분리되어 보이며, 생성된 타입 역시 유니언 타입으로 정확히 추론된다.
@ApiExtraModels(
  AnsweredTechQuestionDTO,
  NotAnsweredTechQuestionDTO,
)
@ApiOkResponse({
  schema: {
    oneOf: [
      { $ref: getSchemaPath(AnsweredTechQuestionDTO) },
      { $ref: getSchemaPath(NotAnsweredTechQuestionDTO) },
    ],
  },
})
async getTechQuestionAnswers() {}export class NotAnsweredTechQuestionDTO {
@IsBoolean()
@ApiProperty({
description: '질문에 답변이 있는지 여부',
example: false,
})
isAnswered: false;
}
export class AnsweredTechQuestionDTO {
@IsBoolean()
@ApiProperty({
description: '질문에 답변이 있는지 여부',
example: true,
})
isAnswered: true;
@ApiProperty({
description: '답변 목록',
type: TechQuestionAnswerDTO,
isArray: true,
})
answer: TechQuestionAnswerDTO[];
}Discriminated Union과 undefined 문제
Discriminated Union을 설계할 때 가장 까다로운 부분은 undefined를 어떻게 표현할 것인가이다. Swagger 스키마는 undefined를 타입으로 직접 표현할 수 없기 때문에, type: undefined를 명시하면 순환 참조 오류가 발생한다.
이를 우회하는 방법 중 하나는 enum: [undefined] 형태로 명시하는 것이다. 이 방식은 OpenAPI 스키마에서 해당 필드를 null로 해석하도록 유도하며, 결과적으로 타입 생성 단계에서도 안전하게 처리된다.
class UnEvaluation {
  @ApiProperty({
    required: false,
    enum: [undefined],
  })
  evaluationType?: undefined;
}/**
* @description Interview evaluation type
* @enum {number}
*/
evaluationType?: null;
/**
* @description Interview evaluation
* @enum {number}
*/
evaluation?: null;다소 트릭처럼 보일 수 있지만, Swagger 스키마 제약과 타입 생성 도구의 한계를 함께 고려했을 때 현실적인 타협안이라고 생각한다.
더 읽어보기
2025.05.21
14. Redis를 사용한 세션 관리 및 캐싱
새로운 프로젝트를 준비하면서 인증 방식부터 다시 고민하게 되었다. 이전 프로젝트에서는 JWT를 사용해 유저 인증과 상태 관리를 처리했지만, 이번에는 Redis를 활용한 세션 방식으로 전환하기로 결정했다. 이 방식은 유저 상태를 서버에서 직접 관리할 수 있어 보안 측면에서도 유리하고, 필…
2025.01.30
비즈니스 로직은 어디에 있어야 할까
Nest.js에서 컨트롤러와 각각의 프로바이더는 분명한 책임을 갖는다. 하지만 막상 서버를 개발하다 보면, 이 책임들을 깊이 고민하지 않은 채 코드를 작성하게 되고, 그 결과 클래스들이 서로의 영역을 침범하는 상황이 반복된다. 나 역시 컨트롤러에 비즈니스 로직이 섞이거나, 서비스가 지나…
2024.12.07
라이브러리를 죽여버릴 수야 없겠지만
상황 Nest.js 서버에서 jest를 사용한 테스트 코드를 작성하고 있었다. 평소에는 아래와 같이 ConfigService를 모의하여 configService.get으로 환경 변수를 처리했다. 그런데 이런 방식이 마음에 들지 않았다. 가장 큰 이유는 필요한 문자열이 하드코딩 되어있어…
2024.12.07
13. Jest 테스트 구성
이 포스트를 시작하기에 앞서 한 가지 분명히 밝혀두고 싶은 점이 있다. 나는 컨트롤러(혹은 GraphQL 기준으로는 리졸버) 와 레포지토리 클래스에 대한 테스트를 거의 작성하지 않는다. 이유는 단순하다. 애플리케이션에서 가장 많은 비즈니스 규칙이 응집되어 있는 곳은 서비스 계층이며, 테…
2026.06.01
React Server Components를 위한 컴포넌트 아키텍처
이 포스트는 Vercel의 Next.js 팀 소속 개발자 Aurora Scharff가 자신의 블로그에 올린 Component Architecture for React Server Components 게시글을 번역한 것이다. 번역하는 과정에서 다소 의역이 있을 수 있으며, 일부 번역에는…
2026.05.26
차트는 멈췄는데 윈도우가 움직인다
상황 어느날 서비스를 살펴보시던 팀장님께서 이런 말씀을 slack에 남기셨다. 진호님, 예측 차트에서 zoom을 계속하면 어느 순간 라인 차트가 아니라 단일 스캐터 차트처럼 보이는 데, 이거 수정하면 좋을 거 같아요. 어느정도 zoom을 하면 그 이후로는 zoom이 안 되도록 할 수 없…
2026.05.21
피자가게로 이해하는 디자인 패턴
에이든 피자는 처음부터 복잡한 시스템을 만들 생각이 없었다. 처음에는 메뉴 몇 개만 만들면 됐다. 그런데 손님은 커스텀 주문을 넣기 시작했고, 주방은 상태를 나눠야 했고, 결제와 배달앱과 알림이 하나씩 붙었다. 코드도 가게를 닮는다. 장사가 잘될수록 이상하게 더 쉽게 망가진다. 디자인…
2026.05.21
7. Decorator — 토핑 추가할 때마다 클래스를 새로 만들 수 없다
에이든 피자에서 주문서를 객체로 만들자 취소와 재주문은 한결 편해졌다. 그런데 주문이 편해지자 손님들도 한결 편해졌다. 편해진 손님은 더 많은 요구를 한다. "치즈 추가요", "올리브도 추가요", "소스 많이요", "조금 더 바삭하게 구워주세요" 같은 요청이 주문대 위로 쌓이기 시작했다…
댓글
댓글을 불러오는 중...