
Express.js에서 OpenAPI를 사용해 Swagger 문서를 설정할 때는, 설정 파일과 스키마를 하나하나 직접 정의해가며 꽤 많은 작업을 해야 했다. 반면 Nest.js에서는 @nestjs/swagger 라이브러리를 사용하면, 비교적 적은 설정만으로도 Swagger UI를 빠르게 구성할 수 있다.
Nest.js의 가장 큰 강점은 컨트롤러와 데코레이터에 이미 존재하는 메타데이터를 Swagger 문서로 그대로 끌어올 수 있다는 점이다. 덕분에 API 문서를 따로 관리하기보다, 코드 자체를 문서의 단일 진실 공급원(source of truth)으로 삼을 수 있다.
Swagger 설정
Swagger UI를 띄우는 설정은 main.ts에서 이루어진다. DocumentBuilder를 사용해 기본적인 문서 정보를 설정하고, SwaggerModule을 통해 문서를 생성한 뒤 UI를 연결한다.
import { SwaggerModule, DocumentBuilder } from '@nestjs/swagger';// main.tsasync function bootstrap() { const app = await NestFactory.create(AppModule); const config = new DocumentBuilder() .setTitle('API 문서 제목') .setDescription('API 설명') .setVersion('API 버전') .build(); const document = SwaggerModule.createDocument(app, config); SwaggerModule.setup('swagger', app, document); await app.listen(3000);}bootstrap();이 정도 설정만 해두어도 @nestjs/swagger는 컨트롤러에 정의된 엔드포인트들을 자동으로 수집해 Swagger UI를 구성해준다. 이후 개발자가 신경 써야 할 부분은 요청과 응답을 어떻게 표현할지뿐이다.
엔드포인트 설정
@nestjs/swagger는 데코레이터 기반 설정을 적극적으로 활용한다. 각 엔드포인트에는 @ApiOperation 데코레이터를 사용해 요약, 설명, 태그 등을 지정할 수 있다.
@Get()@ApiOperation({ summary: 'Get all users', description: 'This endpoint returns a list of all users in the system', tags: ['users'],})getAllUsers() {}또한 엔드포인트가 더 이상 사용되지 않는 경우 deprecated 옵션을 통해 이를 명시할 수도 있다.
컨트롤러 단위로 태그를 묶고 싶다면 @ApiTags를 사용한다. 이때 @ApiOperation의 tags와 함께 사용하면, @ApiTags의 값이 우선 적용된다.
@ApiTags('Report')@Controller('report')export class ReportController {}인증 / 인가 설정
Swagger에서는 OpenAPI의 securitySchemes에 대응하는 여러 데코레이터를 제공한다. 기본적으로는 @ApiSecurity를 사용하며, 상황에 따라 @ApiBearerAuth, @ApiOAuth2, @ApiCookieAuth 같은 축약 데코레이터도 사용할 수 있다.
다만 브라우저 보안 정책 때문에 Swagger UI에서 쿠키가 요청 헤더에 포함되지 않는 경우가 있다. 쿠키 기반 인증을 사용하는 경우라면, Swagger UI에서 인증 테스트가 정상적으로 동작하지 않을 수 있다는 점을 염두에 두어야 한다. 이 부분은 Swagger 공식 문서에서도 언급하고 있다.
요청 설정
클라이언트 요청은 쿼리 스트링, 패스 파라미터, 요청 바디를 통해 서버로 전달된다. 이를 Swagger 문서에 명시하기 위해 각각 @ApiQuery, @ApiParam, @ApiBody 데코레이터를 사용한다.
@Get(':id')@ApiParam({ name: 'id', description: 'The ID of the user', type: String,})getUserById(@Param('id') id: string) { return `User with ID ${id}`;}@Get()@ApiQuery({ name: 'age', required: false, type: Number })@ApiQuery({ name: 'gender', required: false, type: String })getUsers( @Query('age') age: number, @Query('gender') gender: string,) {}@ApiBody({ schema: { type: 'array', items: { type: 'array', items: { type: 'number' }, }, },})async create(@Body() coords: number[][]) {}DTO를 사용하지 않는 경우에도 @nestjs/swagger는 @Body, @Param, @Query를 인식해 기본적인 스키마를 자동 생성한다. 다만 세부적인 옵션은 기본값으로 채워진다.
DTO를 사용하는 경우에는 @ApiProperty, @ApiPropertyOptional을 통해 훨씬 정교한 문서를 만들 수 있다.
export class SignUpDto { @ApiProperty({ example: 'example@test.com' }) email: string; @ApiProperty({ example: 'password1234!' }) password: string; @ApiPropertyOptional({ example: 'https://example.com' }) profileImage?: string; @ApiPropertyOptional({ example: '안녕하세요' }) bio?: string;}enum 값이 제한된 경우에도 enum 옵션을 통해 명시할 수 있다.
mapped-types와 Swagger
@nestjs/mapped-types를 사용해 DTO를 파생시키면, @ApiProperty 메타데이터가 사라지는 문제가 있다. 이는 Swagger 문서 생성 시 필요한 메타데이터가 복사되지 않기 때문이다.
이를 해결하기 위해 @nestjs/swagger는 자체적인 mapped-types 유틸리티를 제공한다.
import { PickType } from '@nestjs/swagger';export class SignInDto extends PickType(SignUpDto, [ 'email', 'password',] as const) {}이 방식을 사용하면 원본 DTO에 정의된 @ApiProperty 정보가 파생 DTO에도 그대로 유지된다.
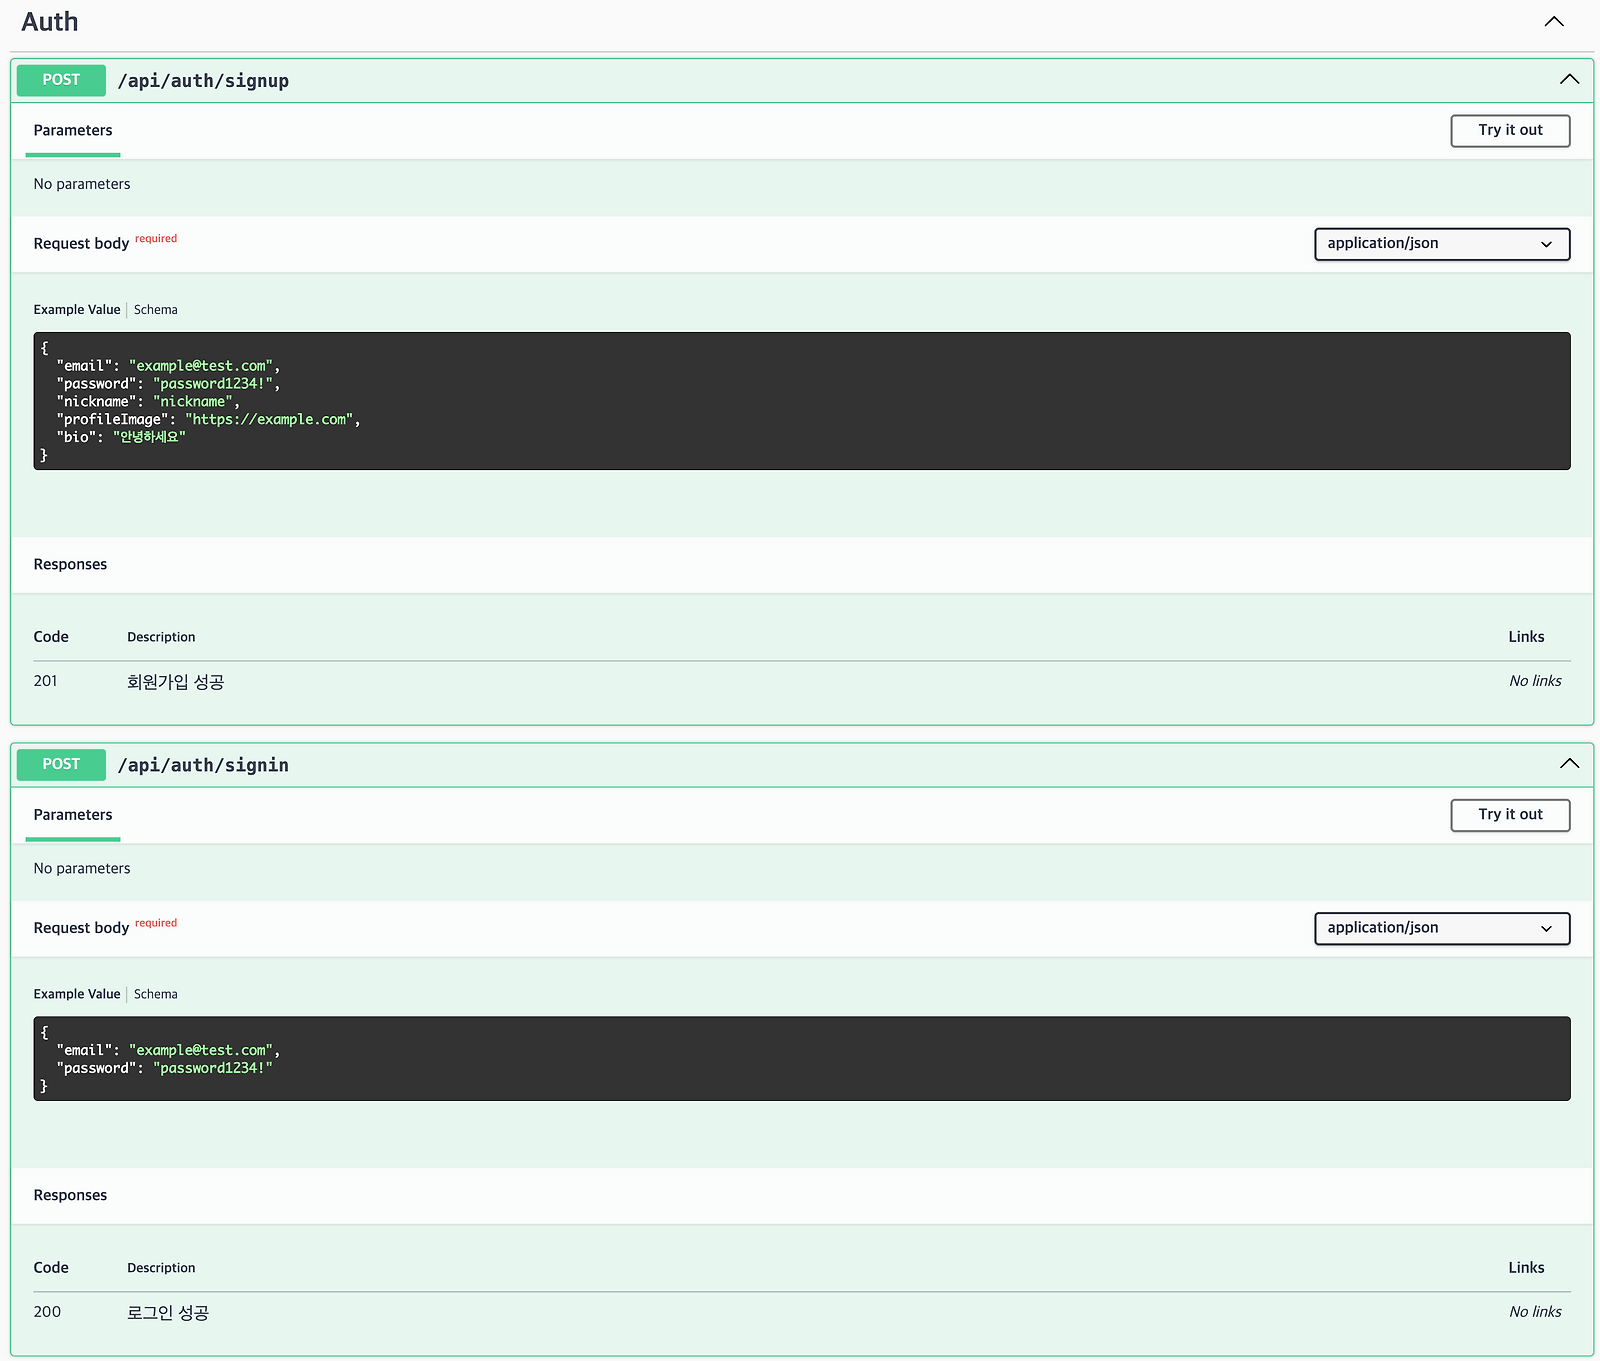
이미지 업로드
멀티파트 요청 역시 Swagger 문서에 명시할 수 있다.
class FilesUploadDto { @ApiProperty({ name: 'images', type: 'array', format: 'binary', }) files: Express.Multer.File[];}@Post('/multi-upload')@UseInterceptors(FilesInterceptor('images'))@ApiConsumes('multipart/form-data')@ApiBody({ type: FilesUploadDto,})async putImages(@UploadedFiles() files: Express.Multer.File[]) {}응답 설정
응답은 @ApiResponse 계열 데코레이터를 사용해 정의할 수 있다. 상태 코드별로 이미 분리된 데코레이터들이 제공되며, 이는 Nest.js의 예외 클래스 구조와도 잘 맞는다.
@ApiOkResponse({ description: '로그인 성공', type: ResponseMessageDto,})@Post('signin')async signIn() {}간단한 응답이라면 DTO 대신 schema를 직접 정의할 수도 있다.
@ApiOkResponse({ description: '로그인 성공', schema: { type: 'object', properties: { message: { type: 'string' }, }, }, example: { message: '로그인 성공' },})@Post('signin')async signIn(@Body() signInDto: SignInDto, @Res() res: Response) {}Discriminated Union 처리
프론트엔드에서 openapi-typescript 같은 도구를 사용해 타입을 생성하는 경우, 백엔드에서 Discriminated Union 형태로 응답을 설계해주면 타입 안정성이 크게 향상된다.
Nest.js와 Swagger에서는 @ApiExtraModels와 oneOf 옵션을 활용해 이를 명확히 표현할 수 있다. 이렇게 작성하면 Swagger UI에서도 응답 케이스가 분리되어 보이며, 생성된 타입 역시 유니언 타입으로 정확히 추론된다.
@ApiExtraModels( AnsweredTechQuestionDTO, NotAnsweredTechQuestionDTO,)@ApiOkResponse({ schema: { oneOf: [ { $ref: getSchemaPath(AnsweredTechQuestionDTO) }, { $ref: getSchemaPath(NotAnsweredTechQuestionDTO) }, ], },})async getTechQuestionAnswers() {}export class NotAnsweredTechQuestionDTO { @IsBoolean() @ApiProperty({ description: '질문에 답변이 있는지 여부', example: false, }) isAnswered: false;}export class AnsweredTechQuestionDTO { @IsBoolean() @ApiProperty({ description: '질문에 답변이 있는지 여부', example: true, }) isAnswered: true; @ApiProperty({ description: '답변 목록', type: TechQuestionAnswerDTO, isArray: true, }) answer: TechQuestionAnswerDTO[];}Discriminated Union과 undefined 문제
Discriminated Union을 설계할 때 가장 까다로운 부분은 undefined를 어떻게 표현할 것인가이다. Swagger 스키마는 undefined를 타입으로 직접 표현할 수 없기 때문에, type: undefined를 명시하면 순환 참조 오류가 발생한다.
이를 우회하는 방법 중 하나는 enum: [undefined] 형태로 명시하는 것이다. 이 방식은 OpenAPI 스키마에서 해당 필드를 null로 해석하도록 유도하며, 결과적으로 타입 생성 단계에서도 안전하게 처리된다.
class UnEvaluation { @ApiProperty({ required: false, enum: [undefined], }) evaluationType?: undefined;}/** * @description Interview evaluation type * @enum {number} */evaluationType?: null;/** * @description Interview evaluation * @enum {number} */evaluation?: null;다소 트릭처럼 보일 수 있지만, Swagger 스키마 제약과 타입 생성 도구의 한계를 함께 고려했을 때 현실적인 타협안이라고 생각한다.
댓글
댓글을 불러오는 중...